Deploy to Sevalla
Learn how to deploy a Node.js server that uses Prisma ORM to Sevalla
This guide explains how to deploy a Node.js server that uses Prisma ORM and PostgreSQL to Sevalla. The app exposes a REST API and uses Prisma Client to query a PostgreSQL database. Both the app and database will be hosted on Sevalla.
Sevalla is a developer-focused PaaS platform designed to simplify application and server deployment. You can easily host your applications, databases, object storage and static sites.
It supports Git-based deployments, Dockerfiles, and Procfiles and runs on Google Kubernetes Engine with global delivery via Cloudflare.
For this example, it's helpful to know:
- Sevalla supports long-running “serverful” applications with built-in autoscaling and flexible pod sizes.
- Git-based deployments are integrated with GitHub, GitLab, and Bitbucket.
- PostgreSQL, MySQL, MariaDB, Redis, and Valkey databases are natively supported.
- Applications and databases can be securely connected through private networking with automatic environment variable injection.
Prerequisites
To get started, all you need is:
- A Sevalla account (comes with $50 in free credits)
- A GitHub repository with your application code.
Note: If you don't have a project ready, you can use our example Prisma project. It's a simple Express.js application that uses Prisma ORM and includes a REST API, a frontend for testing endpoints, a defined Prisma schema with migrations, and an optional database seeding script.
Create an app on Sevalla
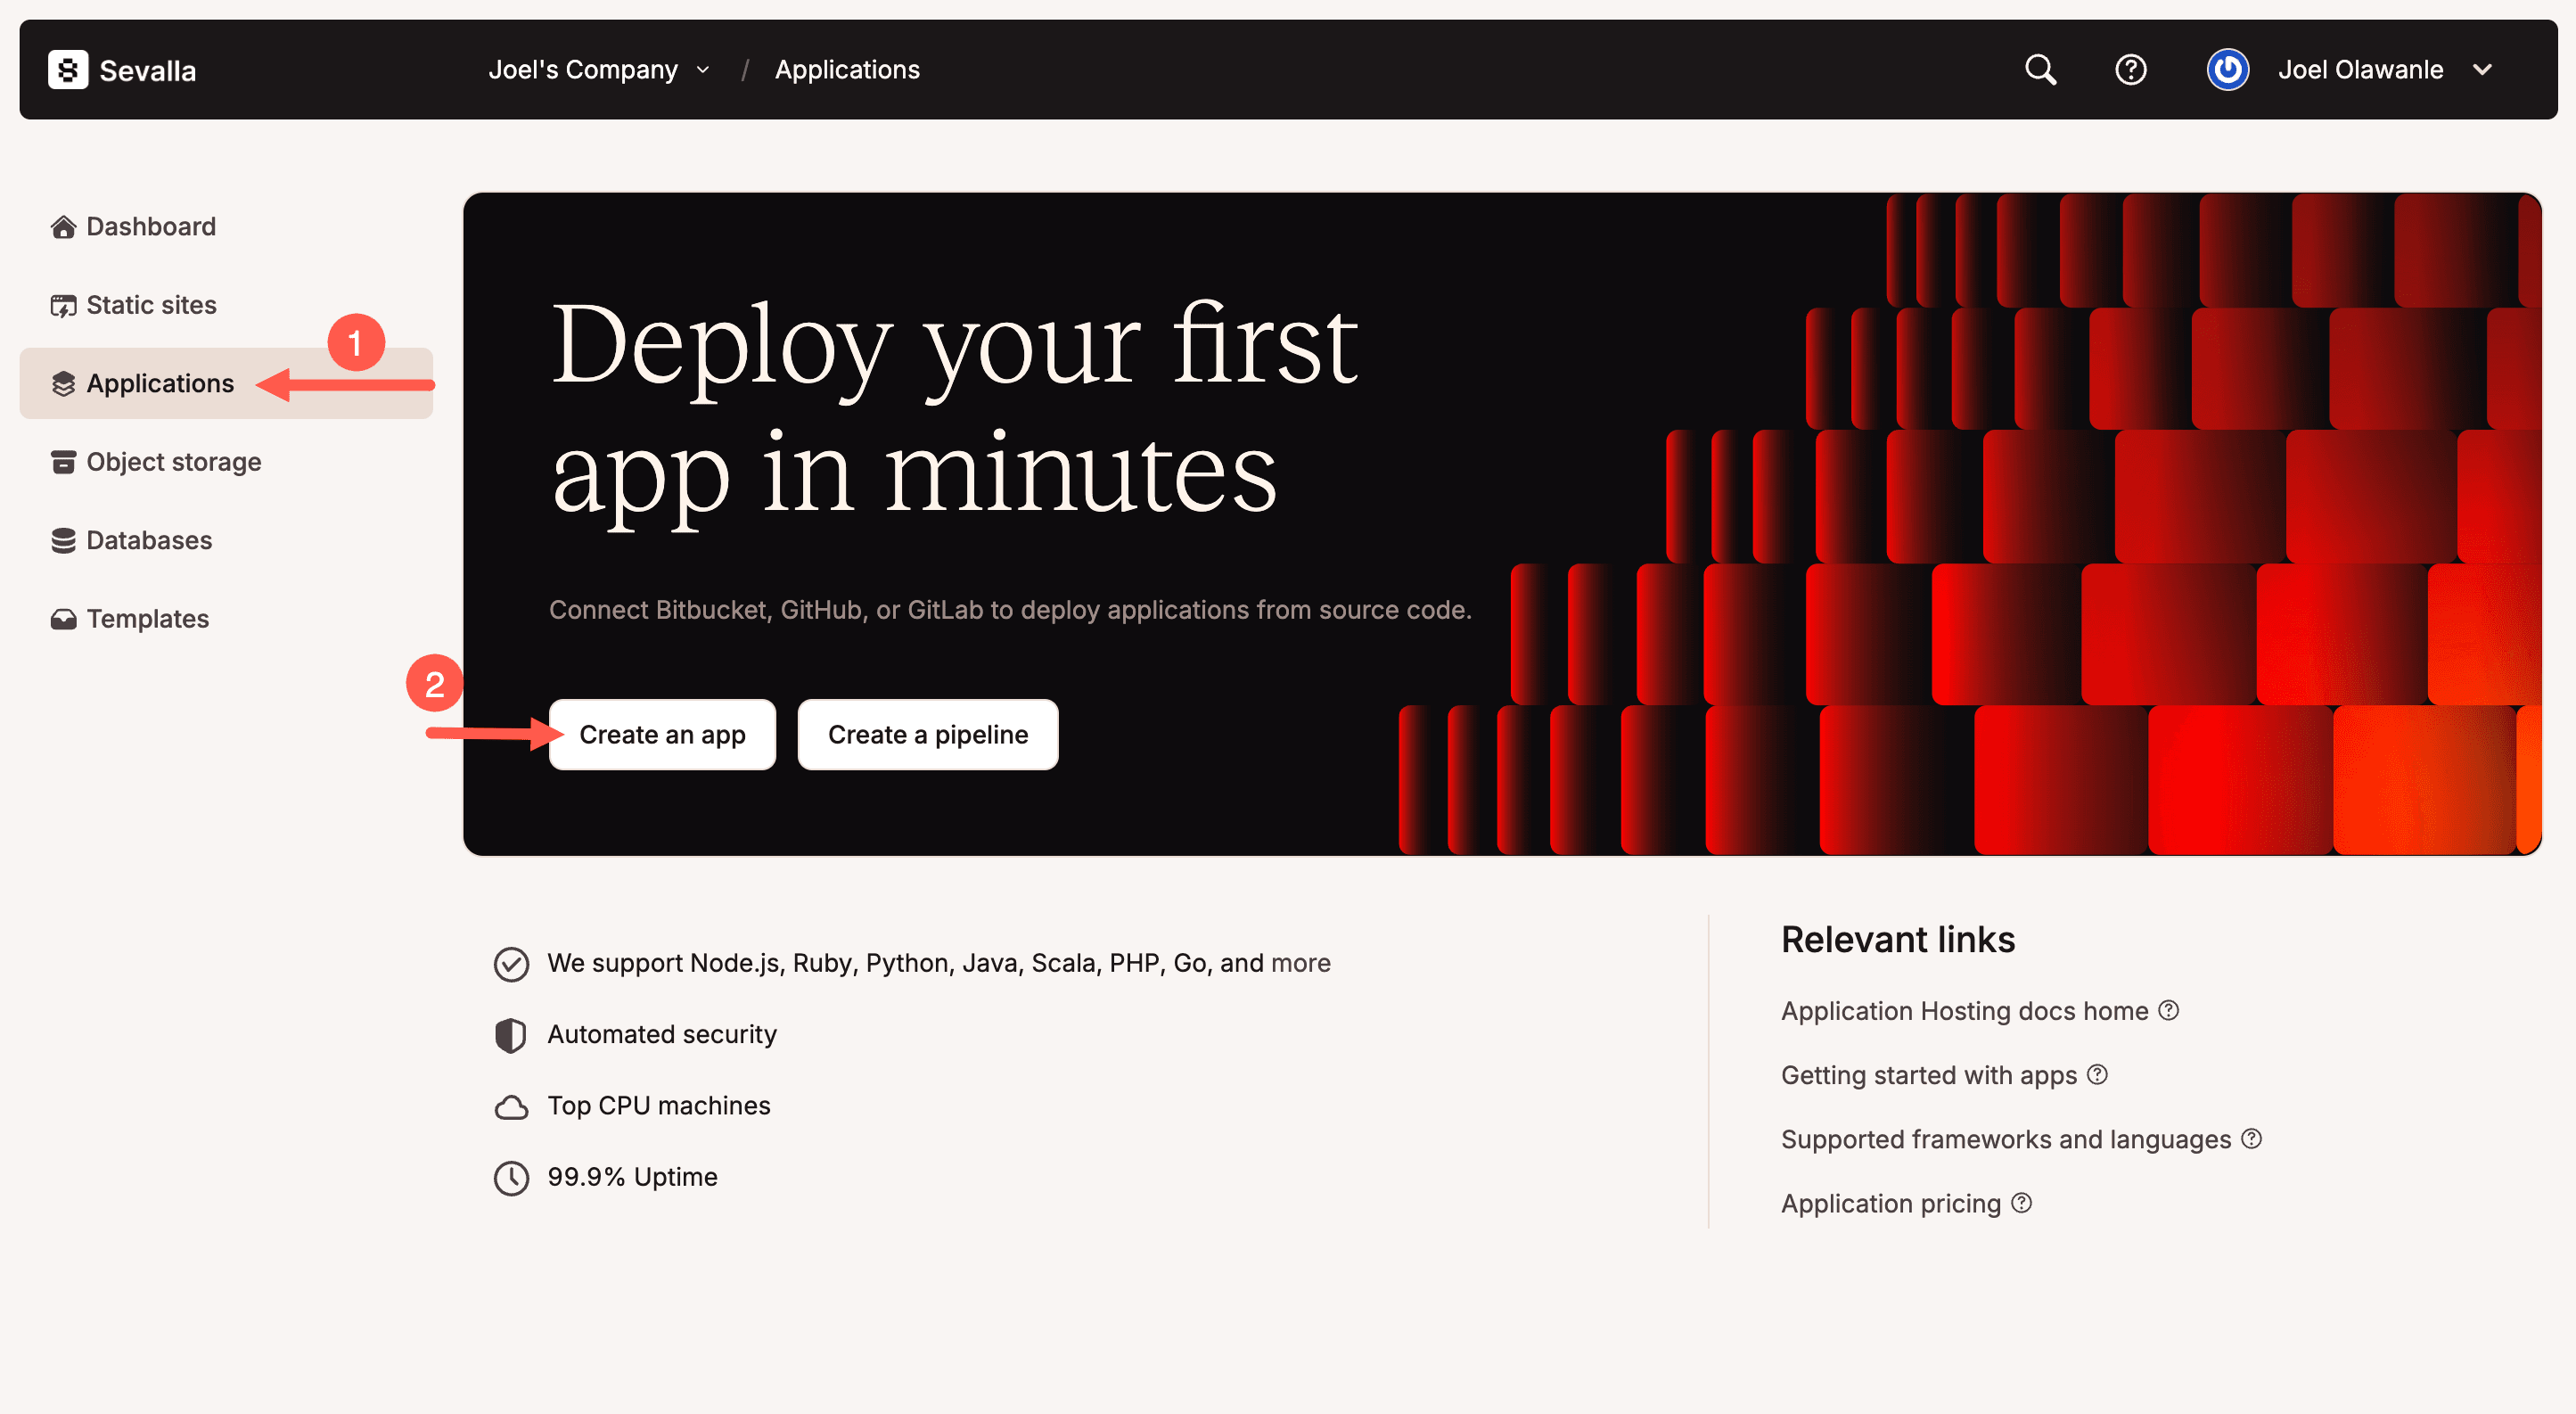
First, create a new application on your Sevalla dashboard. Click Applications on the sidebar and then click the Create an app button, as shown below.
Next, select your Git repository. Sevalla supports deploying from both private and public repositories. If you're using our example project, there's no need to fork — simply enter the URL https://github.com/sevalla-templates/express-prisma-demo.

Choose the appropriate branch (usually main or master), set your application's name, select the desired deployment region, and pick your pod size. (You can start with 0.5 CPU / 1GB RAM using your free credits)
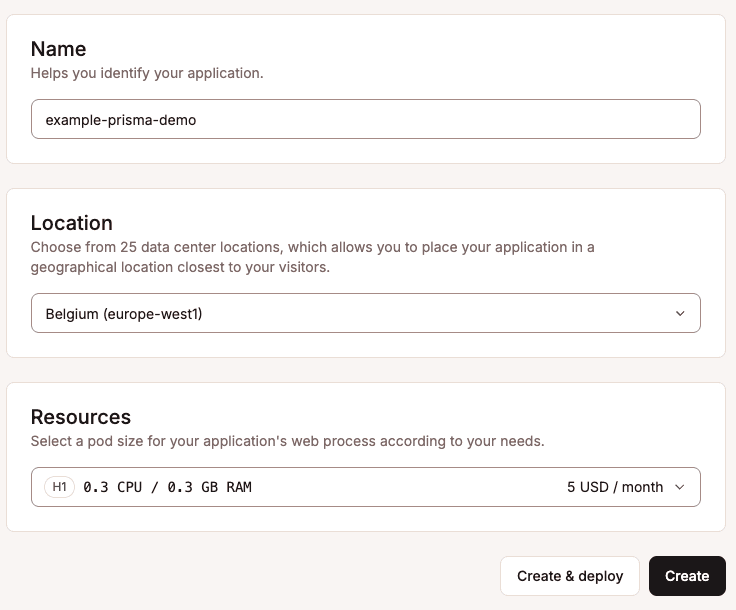
Click Create, but skip the deploy step for now, so it does not fail since we have not added the database.
Set up the database on Sevalla
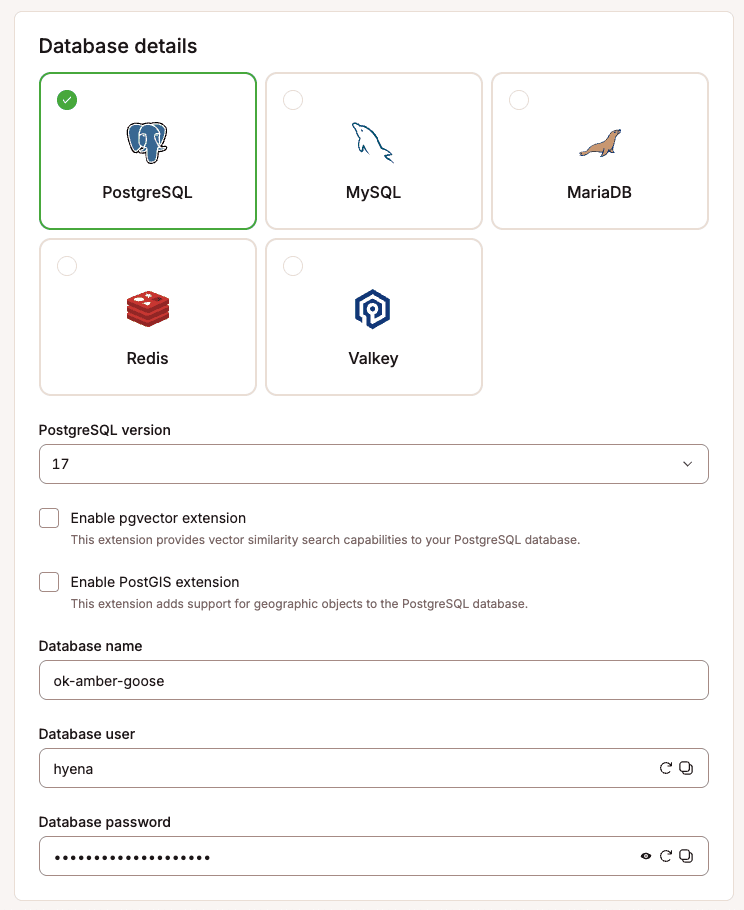
On your Sevalla dashboard, click Databases > Add database. Select PostgreSQL (or your preferred configured database type), and then provide a database name, username, and password, or simply use the default generated details.
Next, give the database a recognizable name for easy identification within your Sevalla dashboard. Ensure you select the same region as your application, choose an appropriate database size, and click Create.
Once your database has been created, scroll down to the Connected Applications section and click Add Connection.
Select the application you created previously and enable "Add environment variables". Make sure the variable name is set to DATABASE_URL (if it defaults to DB_URL, change it accordingly).
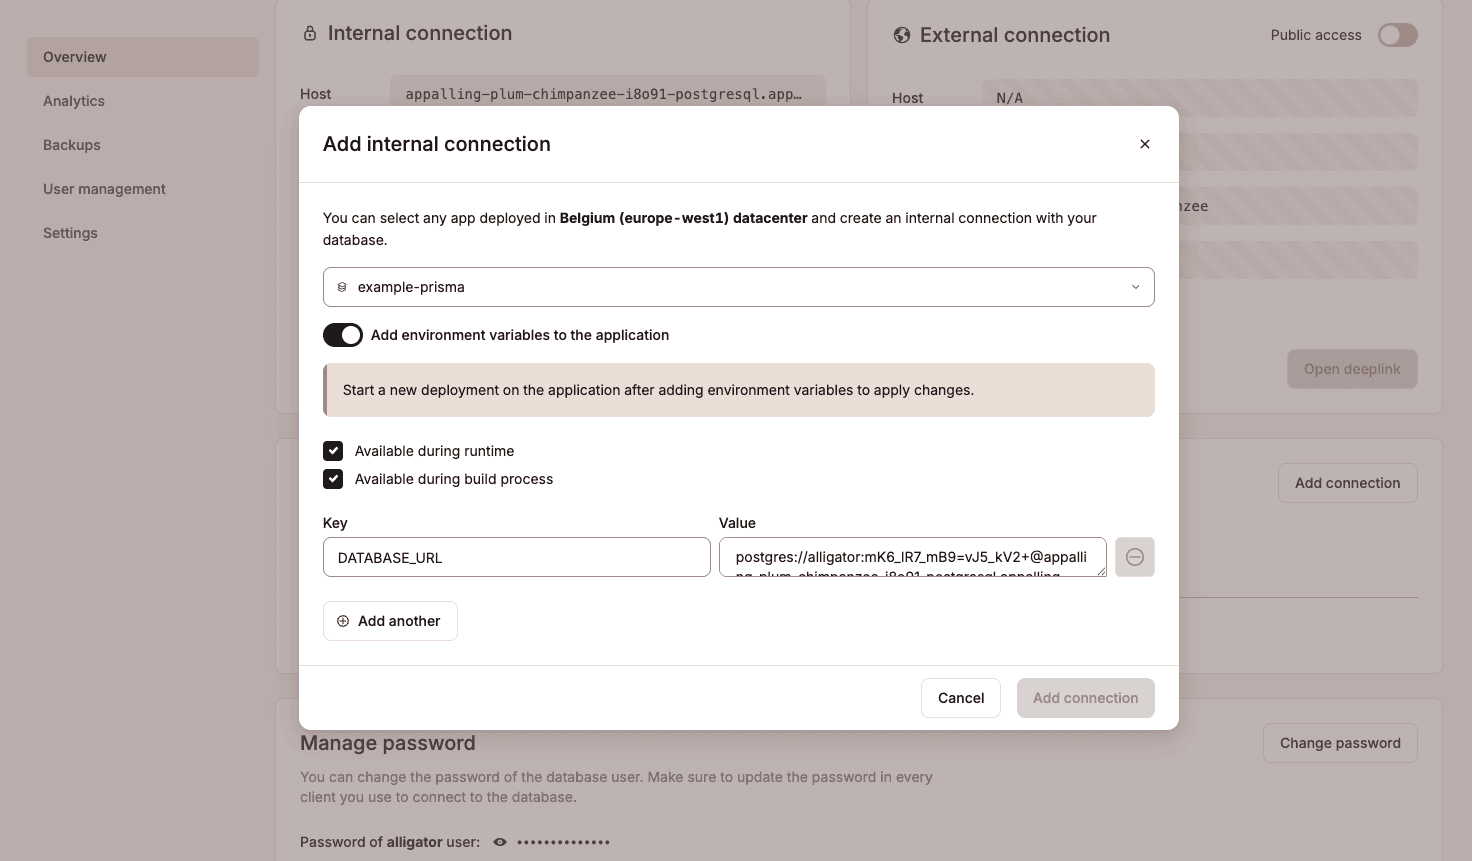
Finally, click Add connection. This securely links your application to your database and configures the necessary environment variable.
Trigger deployment
Now that your application and database are connected, return to your application's Deployment tab and click Deploy.
Note: Sevalla automatically builds your application using Nixpacks, detecting your project's
package.jsonandstartscript. If you'd rather use a Dockerfile or Buildpacks, navigate to Settings > Build, and click Update Settings under the Build environment section to customize your build method.
Seed the database (optional)
If your project includes a seed script (typically located at prisma/seed.js), you can populate your database with initial or demo data after deploying your application.
To do this, navigate to your application's Web Terminal (under Applications > [Your App] > Web Terminal) and run the following command:
npx prisma db seedThis is what the web terminal looks like:

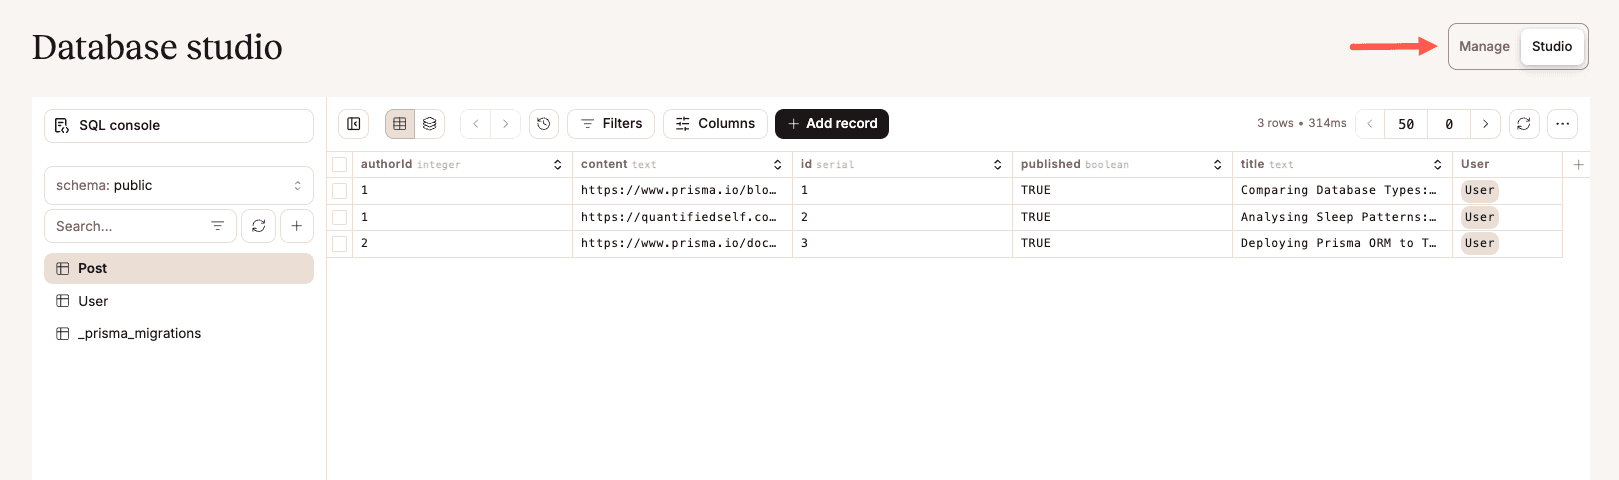
Once this is done, you can manage and interact with your database directly via Sevalla's built-in interactive studio. As shown below, we can see the seeded data:
Congratulations! You've successfully deployed a Node.js application using Prisma ORM to Sevalla. Your app and database are now connected, secure, and production-ready!